Getting started with Entity Framework Core provider for Cassandra
Note
Sample project can be found on this url.
Install the nuget package
Create an empty DOTNET CORE project and install the nuget package EFCore.Cassandra.
Similarly to any EFCore project, create a class which inherits DbContext and add models.
Configure DbContext
Open the DbContext implementation, override the OnConfiguring method and configure database access:
optionsBuilder.UseCassandra("Contact Points=127.0.0.1;", opt =>
{
  opt.MigrationsHistoryTable(HistoryRepository.DefaultTableName, "<schema name>");
});
Configure keyspaces
Definition : A keyspace in Cassandra is a namespace that defines data replication on nodes. A cluster contains one keyspace per node.
In order to configure a keyspace, open the DbContext implementation and insert the following line in the OnModelCreating method:
modelBuilder.ForCassandraAddKeyspace("<keyspace name>", KeyspaceReplicationSimpleStrategyClass());
This method contains two parameters:
- Keyspace name.
- Replication strategy.
There are two replication strategies:
- KeyspaceReplicationSimpleStrategyClass : Use only for a single datacenter and one rack.
- KeyspaceReplicationNetworkTopologyStrategyClass : Use when you have your cluster deployed across multiple datacenters.
Configure tables
Definition : data is stored in tables containing rows of columns, similar to SQL definitions.
In order to configure one table, open the DbContext implementation and insert the following line in the OnModelCreating method:
modelBuilder.Entity<Applicant>()
  .ToTable("applicants", "cv")
  .HasKey(p => new { p.Id, p.LastName });
modelBuilder.Entity<Applicant>()
  .ForCassandraSetClusterColumns(s => new { s.LastName });
The method ToTable contains two parameters:
- Table name.
- Keyspace name.
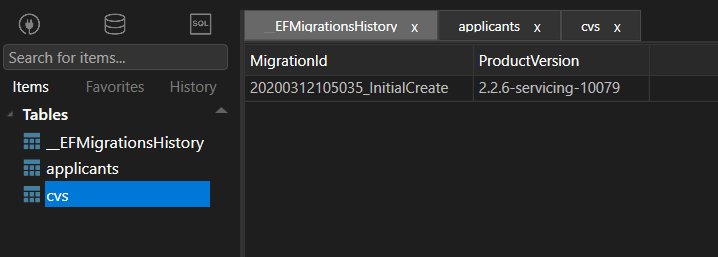
Add migrations
Once the DbContext implementation is configured, run the command dotnet ef migrations add InitialCreate to add migration scripts.
Run the command dotnet ef database update to deploy the migration scripts.
With the TablePlus tool you should see something like this:
CRUD operations
Once everything is set up, you can start playing with the DbContext, use LINQ to run operations like Create, Delete, Update or Select:
using (var dbContext = new FakeDbContext())
{
  dbContext.Applicants.Add(BuildApplicant());
  dbContext.SaveChanges();
}